Walking down Emek Refaim one day last week I saw this sad little chair sitting by a garbage. Eitan spotted it, I spotted it, I looked at it, checked it out and stood looking for a minute. An old man sitting at the bus stop a couple feet away said to me, take it, you have a kid, it's good. It had cheapy plastic creepy clown fabric, and an orangy wood dirty frame, but I figured, let's just grab it because I don't want to regret not grabbing it. And as you may have read, I was on a craft kick, so why not take on a bigger project.
So, I did. I figured I'd give rehabbing it a try, and if it doesn't work out, I didn't lose anything. And Eitan was just transfixed by the "new chair". I scrubbed it clean first thing, it was really gnarly, both the wood frame and the seat. But it was solidly built, and it seemed like with some paint and new fabric, I could give it a new life. And when we go home, we can just give it to someone around these parts if it's cute enough. So me and my friend google did a search for chair renovations, reupholstering, rehabbing and found some sources for how to attempt this undertaking.
Step 1: The original chair, after a serious scrub down:

Step 2: Removing the cushions, and spray painting, a nice glossy, bright white:
I did this outside in the front garden of our building, because you know, paint fumes aren't the healthiest or best smelling. And it takes about 4 hours to dry and I knew I couldn't keep the curious little toddler fingers, and his nap is only 2 hours.

Step 3: Fabric shopping! This was the best part. On Yaffo street in the center of town there are tons of fabric shops. I wanted something that was kiddy a little, but not baby-ish, and something
that wasn't totally boyish too in case it gets passed down to a little girl one day.
Also, sites I read in my research recommended a fabric with a pattern that doesn't need to line up perfectly, especially for my first go around at re-upholstering.

This is what I picked. I think it's awesome. Some people (Esty Altshul...ahem) think it's weird to make something for a toddler with skulls and cross bones, but I think it's funny. And it fit all of my fabric criteria. And, as it turns out, skulls and cross bones for little kids are actually quite fashionable right now, see here and here.
Step 4: Reupholstering:
I didn't even bother to pull off the creepy clown plastic, and just staple gunned right over it. My tools for this project included the fabric, the cushions, a staple gun and tropical flavored mike and ikes.

Step 5: Reassemble the chair and show it to my little customer!
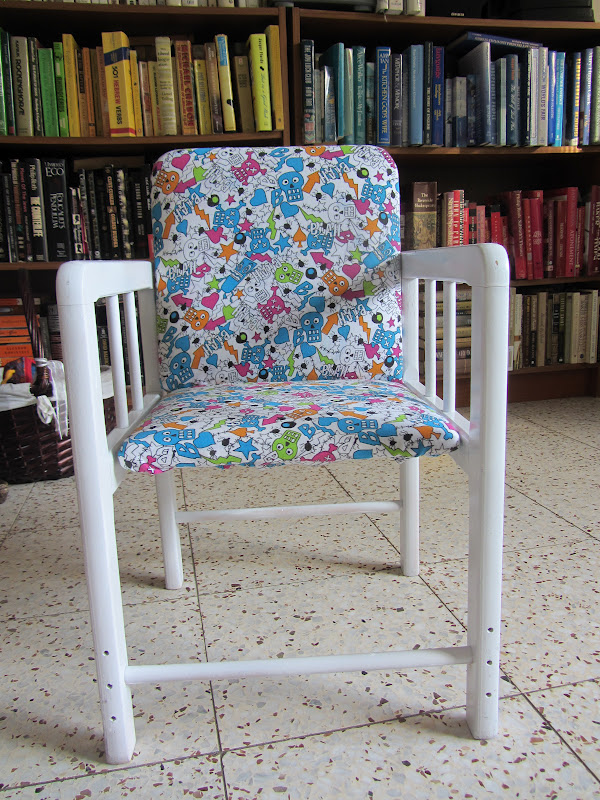


He likes it!
My sources:
http://www.younghouselove.com/2011/10/office-chair-makeover-in-progress/
http://www.younghouselove.com/2011/10/color-me-happy/
http://ramblingrenovators.blogspot.co.il/2012/05/oldie-mini-chair-makeover.html
So like any good blogger, a budget breakdown:
Chair: Free
Spray Paint: 16 Shekels/$4
Fabric: 50 or 25 Shekels/ $12.50 or $6.50 (I bought way way too much thinking I'd make mistakes and need to have extra on hand. So I bought about 50 Shekels worth, but really only used half. More projects will ensue.)
Staplegun: Borrowed, Free (thanks Mallers)
Staples: 4 Shekels/$1
Mike and Ikes: 3 Shekels/75 cents
Grand total: $12.25 (because you know I still think in Dollars)
this is so cute!! he looks so big sitting in a grown up chair!
ReplyDeleteWhat an awesome chair!!! And I couldn't stop watching him dance in circles. Hilarious!
ReplyDelete